Today I want to walk you through the steps of how I built my new craft table.
First let me tell you why I wanted to build the new table in the first place. Well, I have always had a craft table and my own office. I know I'm one lucky lady. My original tables were bought by my parents back in 2011. They have absolutely served me well and I loved the look of them. Many projects had been created at those tables. So they did hold some sentimental value, but it was time to evaluate their flaws. After some time the longer table started to bow in the middle. Not many people noticed this until I pointed it out, but it bugged me. Also the height of the desks was great for sitting but I am a person who likes to stand when I am putting projects together or while I'm painting. I kept finding myself standing at the kitchen counter because I liked the height better, especially when I had friends over to work on various projects. Last thing that bothered me about my desks was the corner spot. The corner unit comprised of three separate desks which meant there was so many table legs in the corner it was impossible to sit at the corner. When we bought the desks unfortunately the corner table was not a perfect square, it was a rectangle which left a gap in the back of the corner. To hide the empty space I bought a paper holder and tool holder to cover the hole. All in all I needed a new functional desk and it was time. Here are my original desks.
Step one was to decide on the design and measurements. I knew I wanted to keep the L shape and the tables needed to be counter height. I also wanted them to be a little long as well for more working space. Putting my computer in the corner is also important so there must be space for my legs to sit at the corner while I use the computer. After measuring I decide I wanted the desks to be 8ft x 8ft and at least 3ft tall,
After looking at multiple designs on Pinterest and online I decided the legs should be cube organizers. I already had one, as you can see in the picture above and it was the perfect height.
Not only did this solve my height issue, but it also solved my storage issue. Plus this meant I didn't have to build the legs, only the table top.
Here are my plans and measurements. These were not the original measurements, I thought they would be a square 8x8 but after cuts and sanding these are the exact measurements.
After I figured out my measurements and design, next was to figure out budget and supplies to purchase. The herringbone pattern at the corner was going to be a challenge but I was excited to test myself.
Here is a list of tools and supplies needed needed:
Power Drill
1/8 drill bit
2" Screws
Wood glue
Miter Saw
Biscuit Joiner and #0 biscuits
Electric Sander
60,120, and 320 grit sandpaper
Rust-oleum White Linen White Chalk Paint
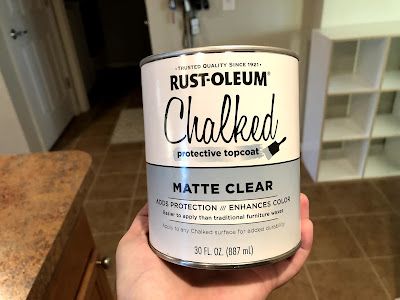
Rust-oleum Mate Clear Sealer
Paint brush
MINWAX Provincial 211 Stain
MINWAX Stainable wood filler
Staining Sponges
Saw Horses
Clamps
WATCO Wipe on Poly
4 - Mainstays 6 Cube Organizer
14 - 4x1 8ft long boards (stained table top boards)
2 - 3x1 8ft long boards (white boarder boards)
3 - 3x1 6ft long boards (white boarder boards)
5 - 2x2 8ft long boards (underneath support boards)
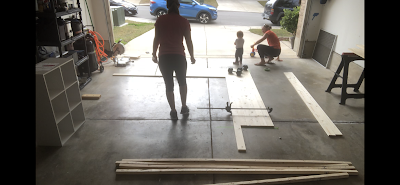
First I laid everything out to make sure my ideas were aligning with reality and I had all of the materials.
Everything was looking good and I was ready to start cutting the boards to length. I didn't have a set plan on size but I knew I wanted to do the herringbone pattern so I needed to cut the boards consistently back and forth. I basically alternated sides cutting 4 inches off with the miter saw until I reach my desire width of each side of the table top.
Next step was to mark on the top of the boards where I wanted the biscuits to be placed. Here I'm placing a line every five inches. Then I placed a circle where the two boards will be joined with a biscuit. I alternated the pattern to give the table top more overall strength.
This was my first time using a biscuit joiner tool. It was very easy to use. All you had to do was adjust the hight and angle of the drill. Line up the center line of the drill with the center line marked on the wood. Clamp or hold the board tight. Get the drill up to speed and the push the mechanism forward. It cut a slot into the wood where the biscuit will sit.
Once all the cuts were made on the boards it was time to join them together with the biscuits and wood glue. First I dry fit the biscuits to make sure it was going to go smooth. I then placed wood glue along the boards where the two were going to join. Adding dabs inside the biscuit slots. I then placed the biscuits and gently tapped them into place with a rubber mallet. I then topped them off with a dab of wood glue and then joined the two boards together. I found using a clamp to push them together really helped. After I joined all the boards I placed the clamps and let the table top dry for 24 hours. I repeated this for each side of the desk.
After both side dried, the next step was to build and attach the support boards. These are the 2x2's.
I laid out the board on the floor and used the miter saw to cut the 2x2 boards to length. I did a frame all around and then added boards to go across in the middle for more support. I used wood glue and attached them with the 2 inch screws.
At this point I was getting very excited seeing the table tops come together. I did have some small gaps in between the boards. This may not bother some people. It did give the tables a bit of a rustic look but this being a craft table and the possibility of using small supplies on desk, I wanted to fill the gaps. I next used the MINWAX wood filler and with my finger rubbed it into all of the gaps.
After the wood filler completely dried it was time to sand it smooth. I forgot to take a picture of me sanding and of the tabletop before staining, but I was very impressed with the wood filler and how it completely filled all the gaps and sanded smooth. I used the full pack of the 60 git sandpaper and used a few sheets of the 120 git paper.
Next I stained both table tops with the MINWAX Provincial 211 Stain. I applied the stain with an old wash rag and did one coat. I didn't want the stain any darker than how the first coat looked.
After the stain dried of a minimum of 8 hours I began the wipe on poly process. I used WATCO Wipe on Poly. This product was very easy to use. I used a staining sponge to apply it. I applied the first coat and allowed it to dry for 4 hour. Applied the second coat and allowed it to dry another 4 hours. Next I lightly sanded the table top with 320 grit sandpaper.
Once they were cleaned and dry I applied the final coat of the Wipe on Ploy and allowed them to dry overnight.
Once the table tops were dry the next step was to cut, sand, and paint the white boarder boards. This is where I ran into some trouble and I had some learning curves. Let me tell you that I should have done this step different. I should have attached these boards, wood filled, sanded, and then stained, and finally tapped off the parts that were to be white. My inexperience showed at this point but it was a good learning opportunity for me. The main issue I was having was the white boards were not sitting flush against the side of the table top. Being a bit of a perfectionist this made me crazy and forced be to sand some of the sides down to help it sit more flush against the sides. I did this instead of starting over completely.

I first cut all of the boards to size with a 45 degree angle at the front corner. Then I sanded, painted, and sealed them.
My sweet husband helped me with this part.
Next step is the final assembly. I was jumping out of my pants excited to see it all put together!
Let me tell you another learning curve I came across. Being a military family there is a 100% chance we will be moving again in the near future. My original idea and plan was to biscuit join and permanently put together the two table tops at the herringbone corner. I even cut all of the slots for the biscuits. Then my husband made a good point about how we were going to get the whole thing into the house once it was put together. This thought then led me to the thought about moving it to another state or country in the future. So I decided to not permanently join the two pieces together at the corner. Instead I joined them with three metal brackets on the underside.
To attach the white perimeter boards all around the desk I used wood glue and the 2" screws coming from underneath and pointing out.
I used the clamps to hold the boards on due to not having an extra hand that day. I first placed the wood glue, drilled the pilot holes with the 1/8 drill bit and then placed the 2" screw.
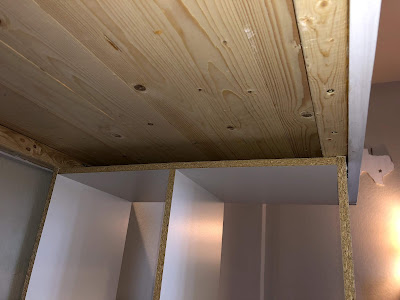
This is the view from underneath, showing the desk is sitting on the support wood on top of the cube organizer.
The cube organizers will be pushed together underneath. So the support boards will be sitting on the cubes from the back side of the table top as well as the cross supports. The three brackets were plenty of support. As I lean on the top of the desk they do not budge at all.
Here it is the final product. Thank you for following my journey. I hope this helps you assemble a craft desk for yourself or give you some ideas to customize you own design.
I hope you enjoyed my build.


No comments:
Post a Comment